🤖 3: AI Chatbot Setup
Welcome to the next step of your Testus Patronus journey! In this exercise, you'll connect your RAG pipeline to your chatbot, enabling it to answer questions using your uploaded knowledge base.
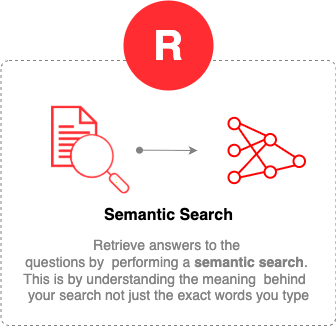
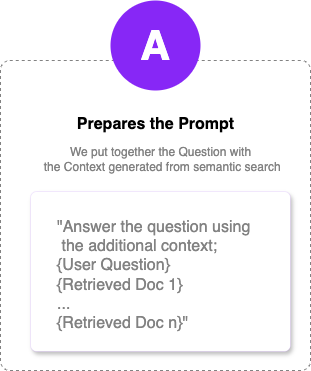
🧩 What You'll Do changed
Release baseline: The grounded Chatflow and Retriever flow documented here targets Dify 1.16.1, the August 2026 workshop default. If you select a dated compatibility release, use its equivalent Knowledge and Studio controls.
Verified configuration: use gpt-35-turbo-16k, select the API-ingested Jira_API_Basic_* knowledge base, bind Knowledge Retrieval.result to the LLM context, and keep the explicit no-match instruction. After importing the solution DSL on another instance, reselect your own knowledge base if Dify cannot resolve the exported dataset reference.
🛠️ Step 1: Start a New Chatflow
Go to the Studio and create a new Chatflow.
 Screenshot: Chatflow landing page
Select Chatflow, give it a meaningful name and description, and create it.
 Screenshot: Creating a new Chatflow
Add a Prompt to the LLM block. Be sure to include both the query and context in your prompt!
 Screenshot: LLM block configuration
Preview your chatbot.
Tip: Pay attention to the Workflow process to see how your chatbot handles queries step by step.
 Screenshot: Chatbot preview
🛠️ Step 2: Add a Retriever Block changed
In your chatbot workflow, insert a Retriever block between the user query input (Start Block) and the LLM block.
 Screenshot: Adding a Retriever block
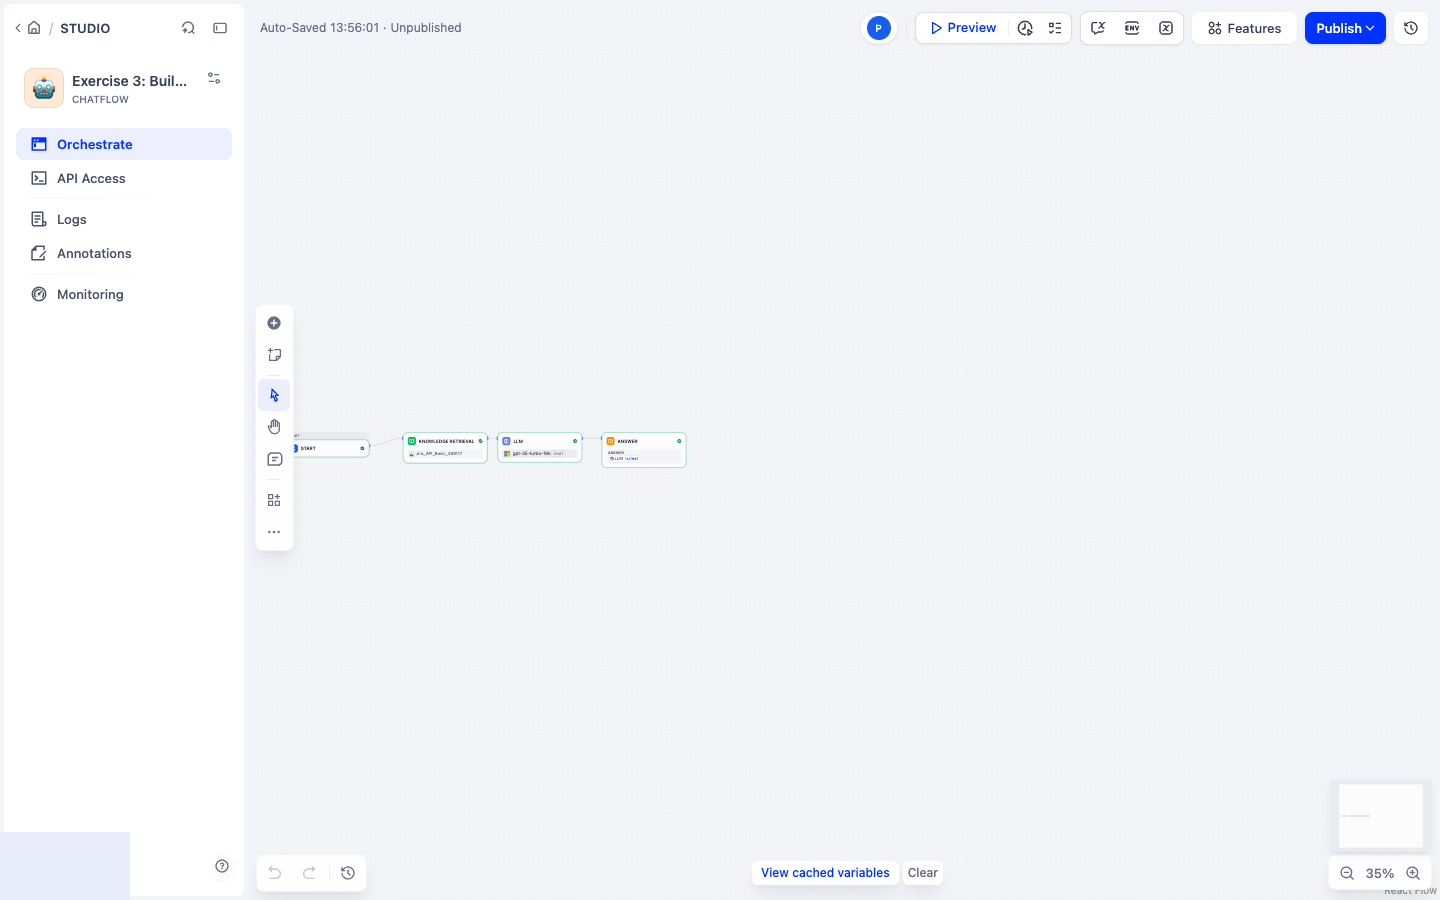 Screenshot: Chatflow with Retriever block
Configure the Retriever to use your knowledge base:
If you completed Exercise 2.1 (API ingestion), select your API-generated knowledge base (recommended for best results).
 Screenshot: Retrieval config
 Screenshot: Selecting a knowledge base
- If you only did the manual upload, select your manually created knowledge base.
Review the metadata filtering controls: Disabled, Automatic, and Manual. Keep filtering disabled in this basic flow because it has no Parameter Extractor. Exercise 4 adds the extractor and applies
issue_key equals extracted_key; do not pretend semantic similarity enforces an exact identifier. Screenshot: Metadata filtering options
Tip: The Retriever block will fetch the most relevant chunks from your knowledge base and pass them as context to the LLM.
❌
Failure: If you haven't connected the Retriever correctly, your chatbot will not be able to answer questions using your knowledge base.
You'll see a generic or empty answer, and the context will be missing!
🛠️ Step 3: Connect the Retriever to the LLM
Make sure the output of the Retriever block is connected to the context input of your LLM block.
 Screenshot: Connecting Retriever to LLM
Now, once the Retriever is properly connected, try again!
✅ Success: Your chatbot now uses the retrieved context and provides accurate, knowledge-based answers!
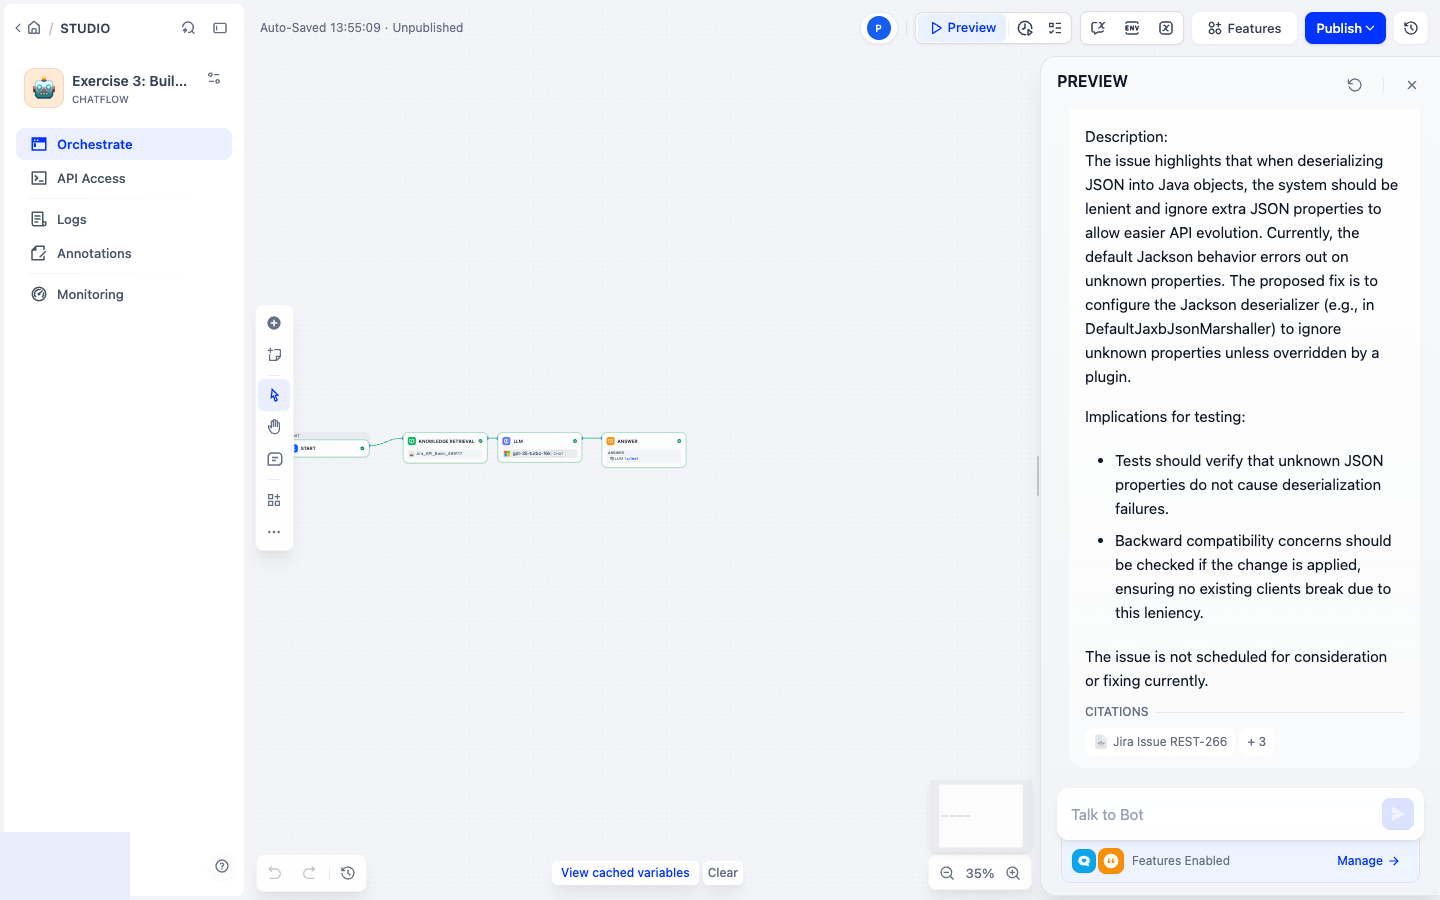 Screenshot: Correct answer with context
🛠️ Step 4: Test Your RAG Chatbot changed
- What is the main focus of the REST module?
- Describe the issue REST-259.
- List features related to webhook support.
Notice: If you used the API-ingested knowledge base, you'll see richer, more accurate answers thanks to structured data and metadata!
Grounding acceptance and Knowledge trace new
Run this risk-oriented query:
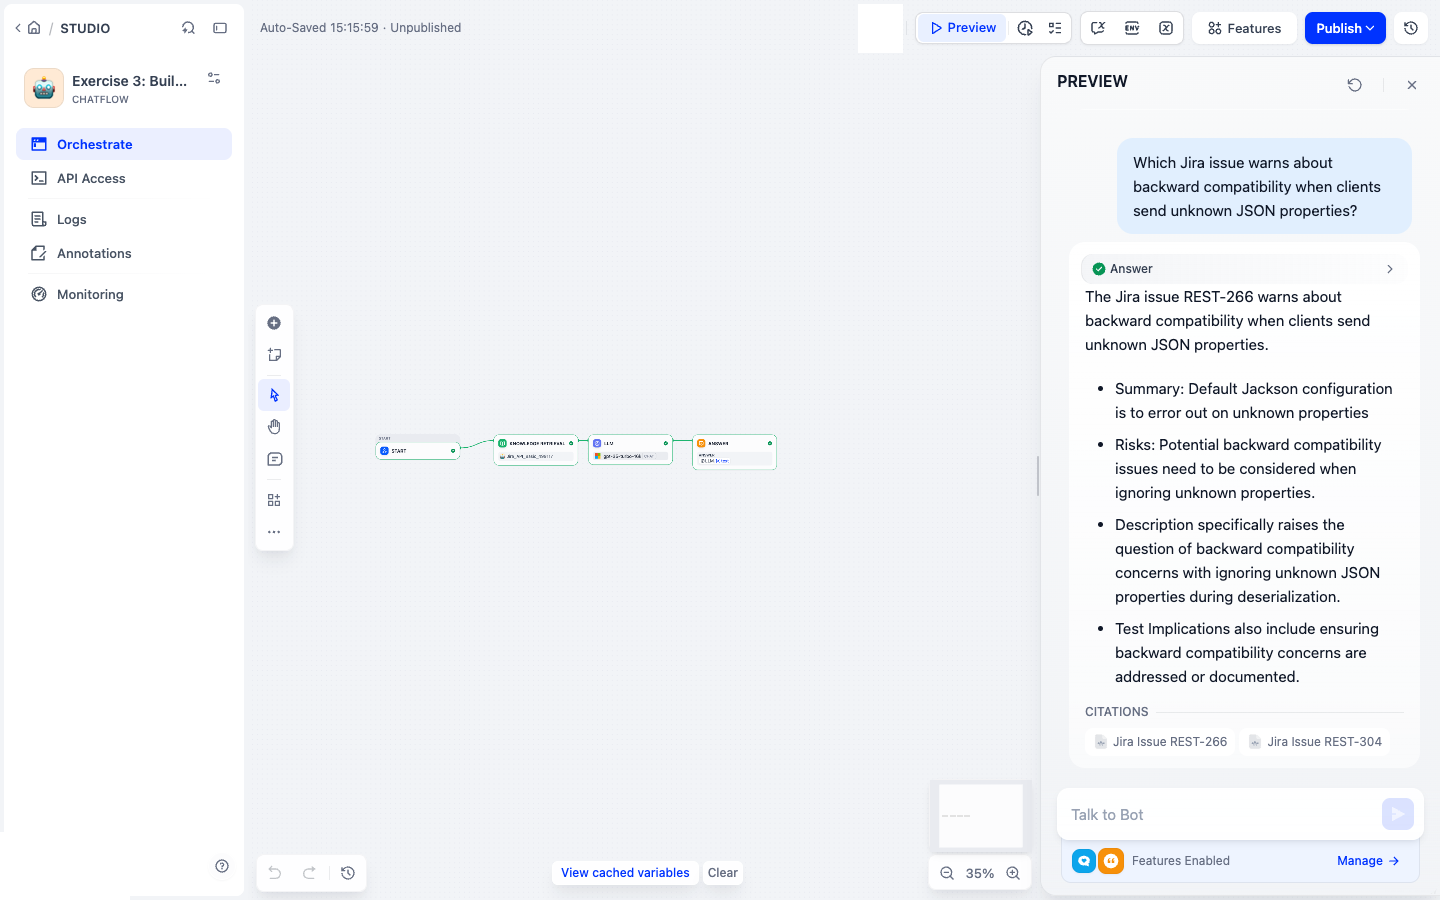
Which Jira issue creates a backward-compatibility risk around unknown JSON properties, and what should we test?
Pass only when the answer identifies REST-266, explains the compatibility risk, states test implications supported by the retrieved context, and displays source citations.
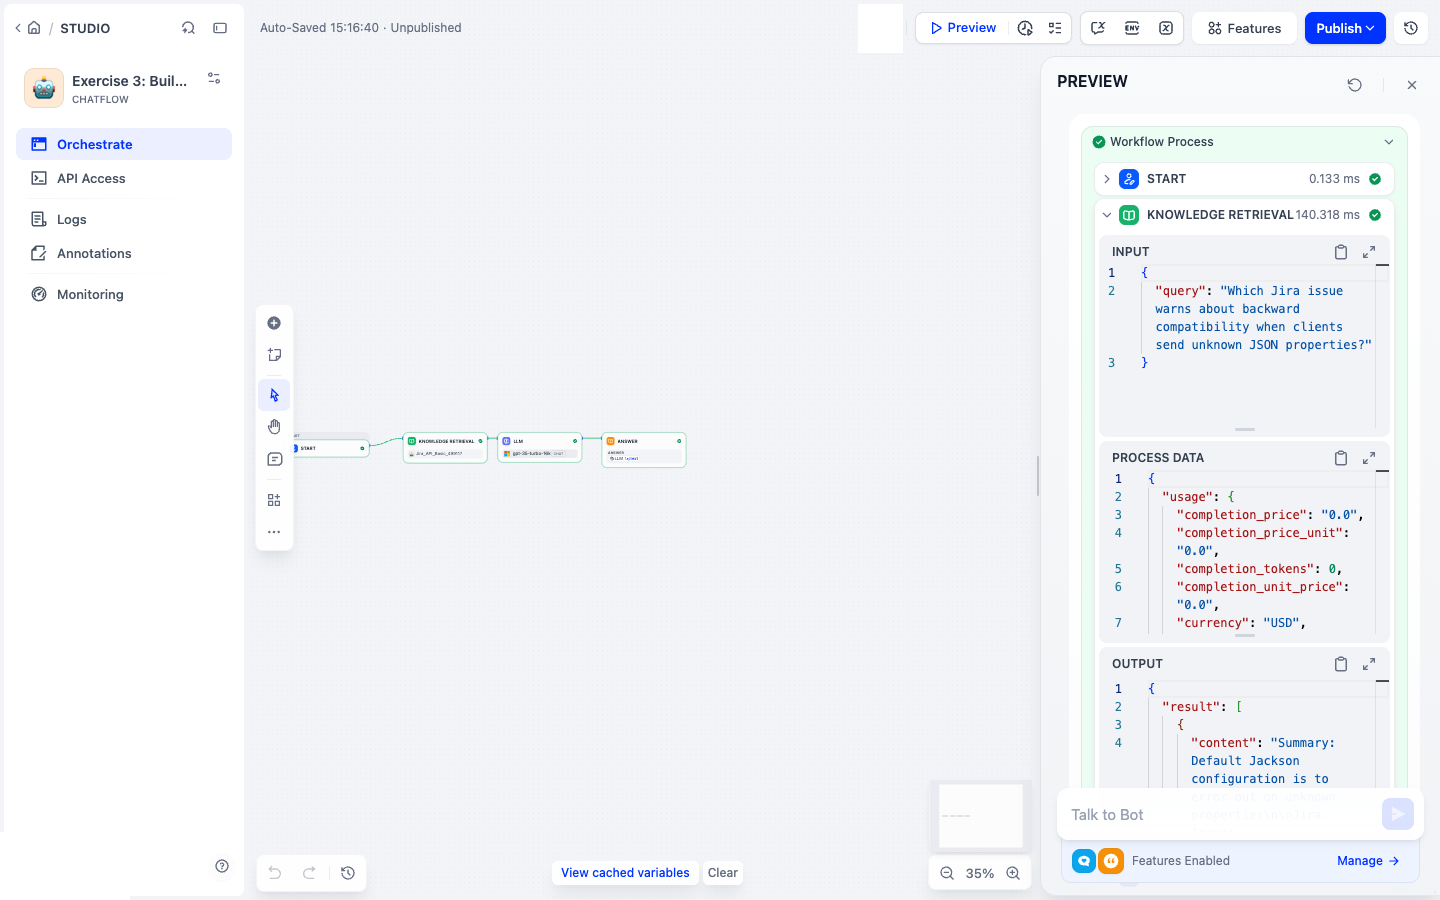
Expand the Knowledge Retrieval node in the workflow process. Check its query input, selected chunks, source metadata, score, and latency. This source-to-answer lineage is stronger evidence than an answer that merely sounds correct.
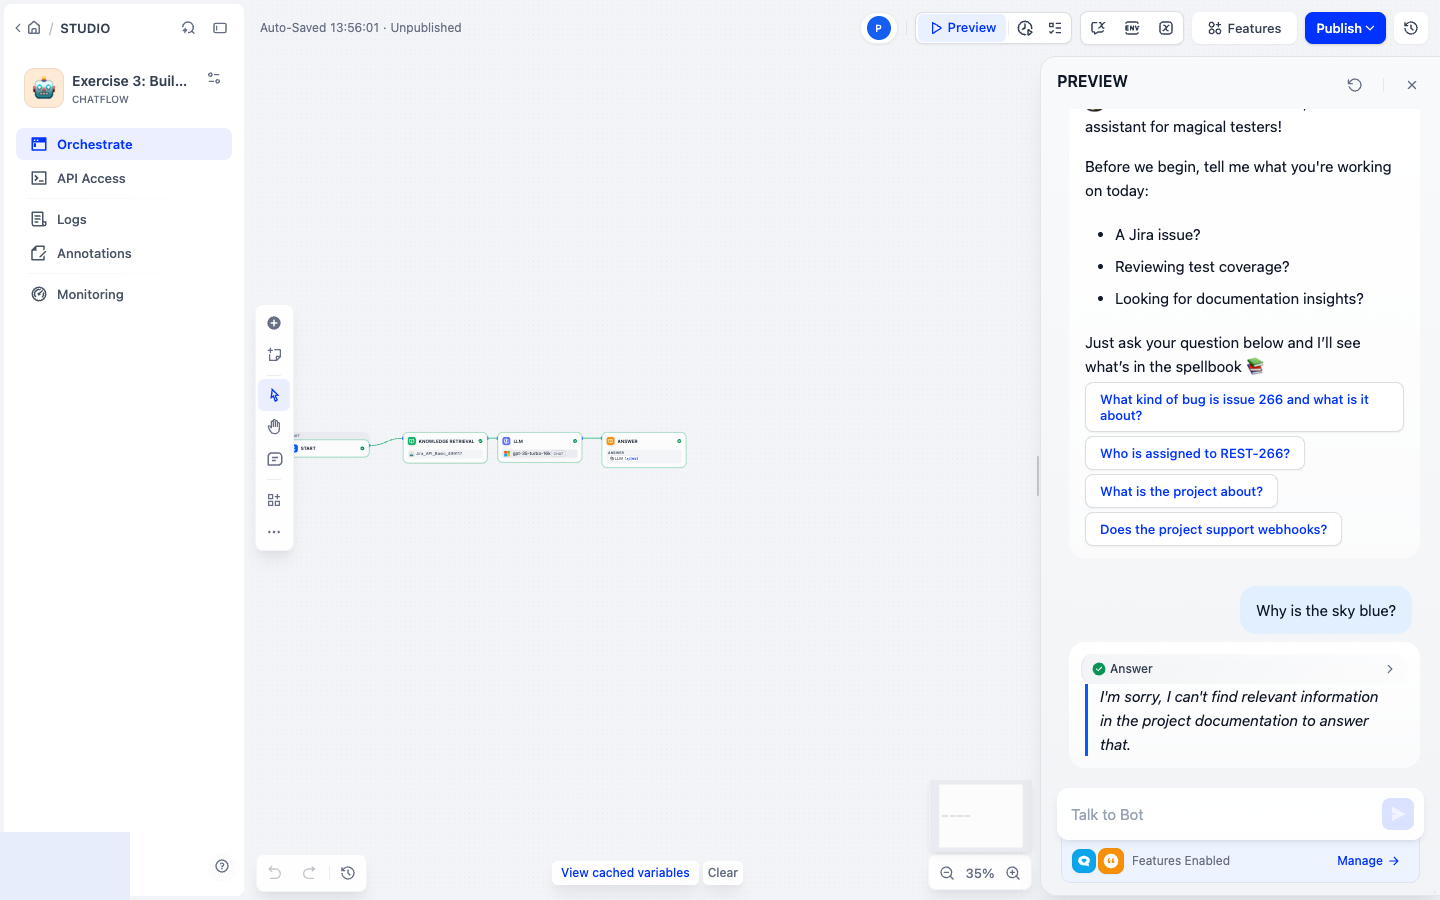
Finally, ask Why is the sky blue?. The retriever should accept no chunks
and the prompt must return the workshop's no-match response instead of model knowledge.
🛠️ Step 5: Augmenting Your Prompt
1. Current Behaviour, Hallucinations, and Out-of-Scope Answers
⚠️
Current Behaviour: Your chatbot may sometimes provide answers that are not based on your knowledge base, leading to hallucinations or out-of-scope responses.
This can happen if the prompt does not clearly instruct the LLM to stick to the provided context.

2. Preventing Hallucination and Out-of-Scope Answers
🔍
Preventing Hallucination: To reduce hallucinations, ensure your prompt explicitly instructs the LLM to only use the provided context and to avoid making up information.
For example, include instructions like: "Only answer based on the provided context. If the answer is not in the context, say 'I don't know.'"
Copy-paste Prompt Example
Answer in a clean, professional tone. Be concise but precise.
Only answer questions using the information provided in the context below.
If the context does not contain relevant information to answer the user's question, clearly say so.

Context:
{{#context#}}

User question:
{{#sys.query#}}

3. Improving Our Prompt and Results
✨ Improving Our Prompt: Refine your prompt to be more specific and structured for your use case. For example, you can:
- Define the assistant's role (e.g., "You are a software testing assistant helping engineers understand Jira issues, project documentation, and related work.")
- Specify the expected format of context documents (such as Jira issue fields and documentation summaries)
- Instruct the assistant to extract and organize key information, highlight relevant fields, clarify technical areas, and reflect testing relevance
- Clearly state how to handle missing information (e.g., mention what's known and what isn't)
This level of detail helps the LLM provide more accurate, relevant, and actionable answers.

Sample Prompt for Students
You are a software testing assistant helping engineers understand Jira issues, project documentation, and related work.

Context documents are formatted like this:

- Jira issues follow this structure:
Jira Issue: <KEY>
Project: <project name>
Type: <Bug | Feature | Task>
Status: <Open | Closed | etc.>
Assignee: <Name or Unassigned>
Created: <date>
Updated: <date>

Summary: <short summary>

Description:
<full description>

- Summaries and technical documentation may also include:
Summary, Contributors, Assignees, Reporters, Issue Count, Type.

Use this format to extract and organize key information when answering.

Your reply should:
- Provide a concise, professional summary of the issue or topic
- Highlight relevant fields (summary, type, status, assignee, etc.)
- Mention related issues or documentation when available
- Clarify technical areas (e.g. endpoints, APIs, modules)
- Reflect relevance for testing (e.g. requires new test case, linked to bug, feature readiness)

If information is missing, mention what's known and what isn't.

Context:
{{#context#}}

User question:
{{#sys.query#}}
✨ Optional: Enable Chatflow Features (e.g., Conversation Opener)
Consider enabling a Conversation Opener to make your chatbot more welcoming and user-friendly!
🎩 Welcome to Testus Patronus, the AI assistant for magical testers!

Before we begin, tell me what you're working on today:
- A Jira issue?
- Reviewing test coverage?
- Looking for documentation insights?

Just ask your question below and I'll see what's in the spellbook 📚
- What kind of bug is issue 266 and what is it about?
- Who is assigned to REST-266?
- What is the project about?
- Which issues are currently open?
- Does the project support webhooks?
Tip: You can configure these features in your Chatflow settings to improve user experience!
📝 Sample Queries
- What kind of bug is issue 266 and what is it about?
- Who is assigned to REST-266?
- What is the project about?
- Which issues are currently open?
- Does the project support webhooks?
- What features are planned for the next release?
- Who is assigned to REST-259?
- Summarize the technical documentation for the REST module.
🤔
Open Question: Are all the queries above answered properly by your chatbot? If not, why do you think that is? What could you improve in your knowledge base or prompt?
You'll learn more about troubleshooting and improving your chatbot's answers in Exercise 4: Advanced Prompting & Relevance Tuning!
🚀 Publishing Your Chatflow changed
- In the Dify Studio, open your Chatflow project.
- Look for the Publish or Share option (usually in the top-right corner).
- Click on Publish Update and then Run App.
- Share the link with your team or test it in a new browser window.
- Optionally, you can also share it as an embed on a website.


Tip: Test your published chatbot with the sample queries above to ensure everything works as expected!
Preserve an accepted version new
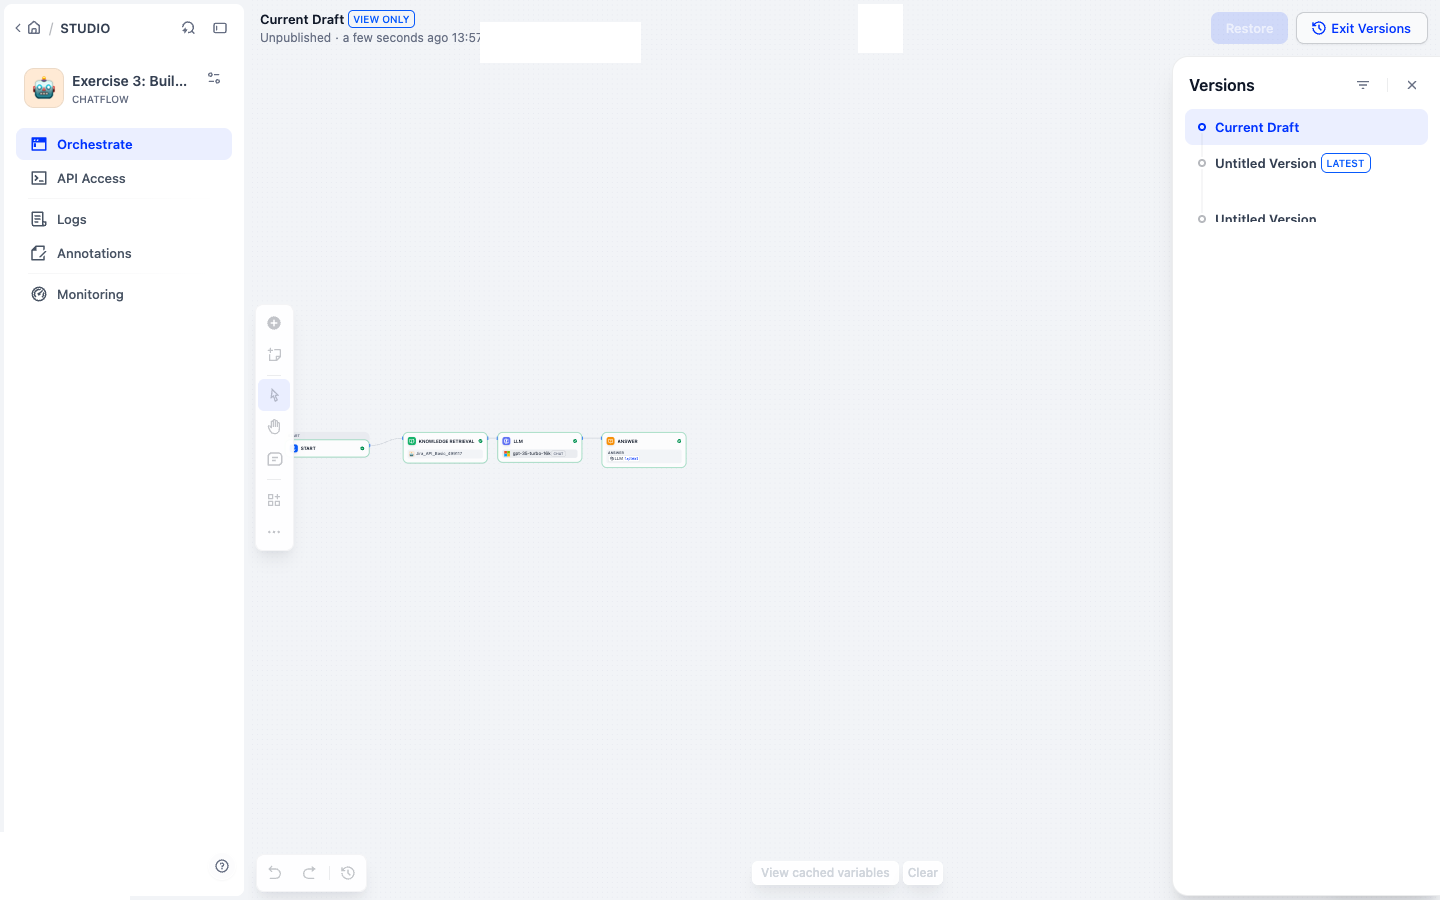
Publishing creates an auditable snapshot rather than making the current draft implicitly safe:
- Publish only after the fixed retrieval and grounding checks pass.
- Add a short version note describing the accepted benchmark.
- Open the version history and confirm that the published snapshot can be restored to a draft.
- Keep the exported DSL as a portable artifact, but use the in-product version for a fast rollback on this Dify instance.
🧩 Solution Download
⬇️ Download Exercise 3 Solution DSL
Ready to see your chatbot answer questions with real context? Move on to the next exercise to explore advanced prompting and evaluation!